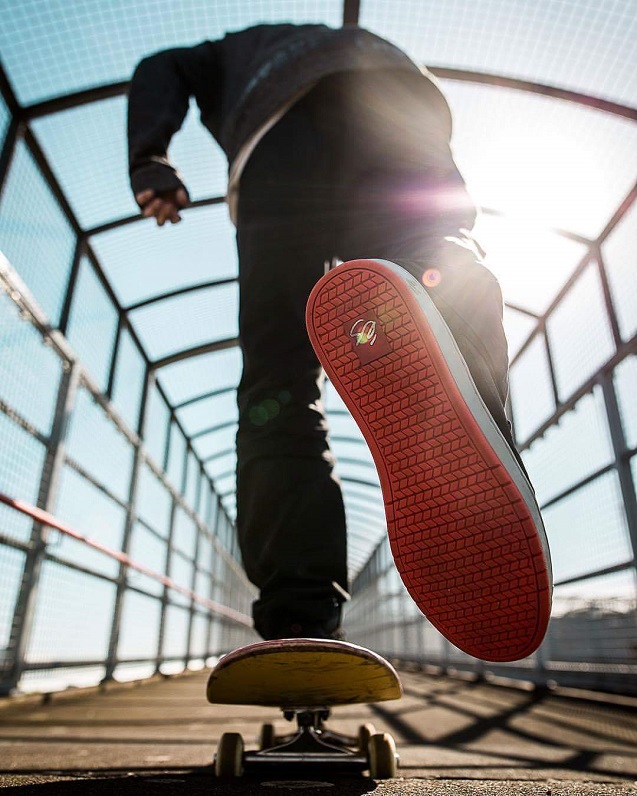
Footwear is an important part of every sport and while some sports require special boots, skateboarding is a bit different. A skate shoe doesn’t look that much different than a regular sneaker and you might have owned one but haven’t been aware of it. Whilst wearing skate shoes isn’t mandatory in order to skateboard, it is always better to have a pair on as it will make it easier to perform tricks and they’ll make the overall experience more comfortable. These type of shoes usually have a grippy texture and extra padding but there is more to them than that when it comes to finding the right pair.
What to Consider
Vulcanised vs Cupsole
A vulcanised sole has no stitches holding the front but instead it uses foxing tape. These have a smoother rubber finish and a foxing stripe. Vulcanised skate shoes Australia skaters prefer feel softer and are a lot more flexible than cupsole shoes. You can break in vulcanised shoes quickly and they will also give you good grip and board feel too.
Cupsoles have multiple layers to them, starting with a solid layer, EVA or TPR cushioning and then some rubber layer sprinkling. The cushioning is placed under what is called a rubber cup which makes them a bit bigger. This means that there is less board feel but also better impact absorption. Cupsoles are more durable than vulcanised shoes and usually have more heel support too.
Types

There are three types of skate shoes, low, mid and high-tops. Low-tops are the standard and weigh less than mid and high-tops. They also allow for the most freedom of movement but they don’t provide ankle protection due to the lack of padding. You will easily get your ankles hit by the board with low-tops.
Mid-tops sit around ankle level and provide more ankle protection than low-tops but don’t allow for as much mobility. They are a great option if you want to have a balance between mobility and protection.
High-tops cover the ankle completely which makes them the most restrictive but also the most protective. High-tops will also make your feet soggy and sweaty as they do not allow them to breathe as much.

Fit
A quality pair of skate shoes Australia skaters would feel comfortable wearing must have minimal or no heel lift for a proper fit. Also, there should be no pain, loss of circulation or discomfort. You can always try skate shoes in store and then buy them online for cheaper but you must wear socks while fitting them. They shouldn’t be too lose nor too tight but you should keep in mind that they will loosen as you break them in.
Material
Suede is the most popular material when it comes to technical skateboarding as it is durable and flicks very well. This type of material is going to be the easiest to repair if you were to tear it which is highly unlikely. Remember though, suede will attract dirt and dust way quicker than other materials.
Shoes made of canvas are more affordable than suede as they don’t last as long. If you like to cruise or take long rides on a longboard, then canvas shoes are going to do just fine. Canvas shoes won’t make your feet as sweaty but you should avoid getting these if you want to do flips and ollies. If you do bowls, verts and mini ramps, canvas shoes are going to serve you just fine.
Full grain leather is the most durable material you’ll find on a skate shoe but it won’t provide good grip or flick. Synthetic leather is a good alternative as it looks almost exactly like real leather and it is animal-friendly too.
How to Lace Skate Shoes?

Proper lacing is done in order to prevent the laces from getting undone thus tripping you from your board. People also do this in order to make their shoes look better and tying your laces properly will also keep them from wearing out too quickly.
First, let’s go over how to tie laces without a bow. Start by inserting the lace into the final loop going downwards. Then pull out both ends of the lace and cross them at the toe of the shoe with one end over the other. Afterwards, tie two single knots at the toe of the shoe and adjust the length of the knots to your desire. The final step includes tucking in the tied laces under the tongue of the shoe and then doing the same thing all the way up. Remember – the laces should not get in the way of the toe of the shoe.
Crisscross lacing is done by tying the two ends through the eyelets going from the outside to the inside. Then you take the right end and thread it across the reverse-side of the eyelets and do the same thing with the other end. Do this until you get to the top of your shoe and you’re done.
Straight or bar lacing is done by double knotting the lace at one end starting at the bottom row. Then you start threading the other end from inside out and pull it from the right to the top. Start moving the lace from the opposite eyelet and repeat the threading inside out. Then thread the lace from the top eyelet to the bottom and then repeat the inside out threading method on the opposite eyelets too.
Zipper lacing starts with a knot on one end of the lace too but it is followed by an anchor. Once you do that, thread the other end of the lace inside out through the right bottom eyelet. Then loose one end of the lace from the opposite position and thread it through the eyelet opposite and above it. After that just pull through and go to the opposite eyelet again. Repeat the process of loosening and threading the lace through in the opposite direction until you reach the end.