Off-roading vehicles have existed for more than 100 years now. The Kegresse track was the first-ever vehicle that could be driven on grass, snow, dirt and other similar conditions. Although off-road vehicles were being used early on in the 1900s they weren’t made commercially available until after WWII. Off-road vehicles then moved from the military to construction and freight industries. Auto manufacturers saw the opportunity to make off-road vehicles too with their client’s specific needs in mind.

The first off-road vehicle meant for civilians was the British Land Rover which was made available to the general public back in the 1940s. The craze for lifted trucks started in the 1970s mainly thanks to a guy called Bob Chandler – he replaced the 48 inch (120 cm) tires on his truck with 66 inch (167 cm) tires. In the 1990s lifted (off-road) vehicles started to become more mainstream as more and more features and accessories were becoming available. Today, 4×4’s are synonymous for off-roading but no off-roading trip is a safe one with some off road accessories.
Must Have Off Road Accessories
Air Compressor
When it comes to having a better overall experience and keeping that experience from ending to soon an air compressor is a much needed accessory. An air compressor just like a lot of other 4×4 accessories is capable of providing better performance. An air compressor allows you to adjust your tire’s air pressure so you have better traction.
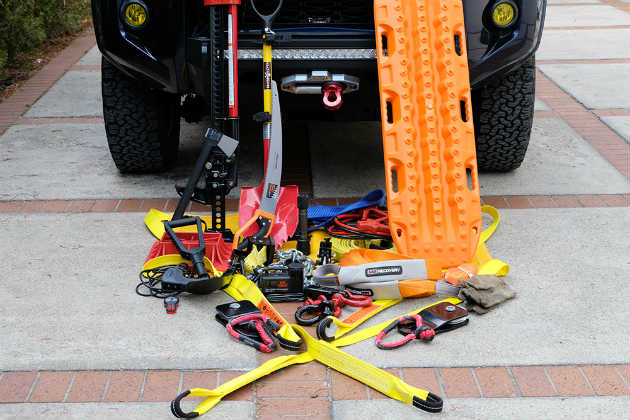
Recovery Kit
A recovery kit is going to help you get your 4×4 out of a muddy trail or from a hole. This is a set of tools that will allow you to extract your vehicle safely either by your self or with the help of a mate. This kit usually includes 4wd accessories such as bow shackles, a snatch strap, recovery boards and a shovel.
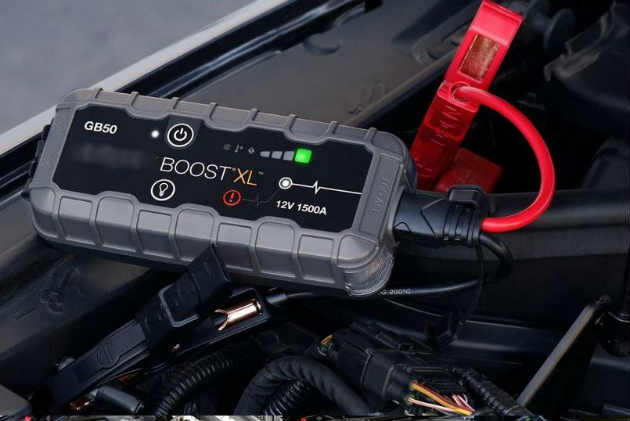
Portable Jump Starter
You never know when your vehicle’s battery can die on you and although there are signs that indicate battery failure you don’t want to end up stuck in the middle of nowhere. This is where carrying a portable jump starter can save the day especially when you are going on an adventure on your own.
How to Use Them
Air Compressor
1. A portable air compressor with a digital gauge can help you both inflate and deflate a tire. The first thing you need to do is place the air compressor so that the hose can reach all four tires. Once that’s done plug in and turn on the air compressor. Then, remove the cap from the valve stem on the tire and fit the hose on it.
2. Make sure you have the target pressure set if your air compressor happens to have that feature, otherwise you’ll need to pay close attention to the gauge. Press the lever to start inflating the tire and whilst that’s happening ensure that you are securely holding onto the hose. If you have set a target pressure the compressor will shut off automatically otherwise you’ll need to remove the hose from the valve stem and power off the compressor when you’ve reached the desired air pressure.
Recovery Kit
1. While there are different recovery scenario’s using a recovery kit is generally going to be about the same when it comes to most terrains and conditions. The first thing to do is to either put the recovery boards under the tires or use the snatch strap to secure your vehicle either to your mate’s 4×4 or a tree.
2. Next, what you want to do is secure the snatch strap to your vehicle using the bow shackles. You may want to change the tire’s air pressure to make things easier and then start winching out your vehicle. Do this in increments. Before you do all this tough be sure to try and spin the wheels as sometimes it is all your vehicle needs to start moving again.
Portable Jump Starter
1. With a jump starter it’s important that you don’t mix things up and do more harm than good. With these type of 4×4 accessories you have to be extremely safe. Before you start using a jump starter ensure that both your vehicle and jump starter are off before you reboot your battery and that the keys are out of the ignition. Avoid connecting the red and black clamps together and ensure that you do not have flammable items or liquids near the vehicle or jump starter.
2. With that in mind, connect the two cables (positive and negative) with the red clamp on the positive terminal and the black one on a non-conductive metal in your vehicle. Turn on the jump starter and wait until it starts up, then, turn on the ignition. Turn the engine for about 5 seconds at a time and if it doesn’t start wait for 3-5 minutes and start again. When your engine does start, turn off the jump starter, remove the black cable and then the red. Keep your vehicle on after you’ve jump started it – take it for a ride too.